Have you ever found yourself locked out of your WordPress admin panel? Whether due to a forgotten password or an unexpected website issue, losing access can be frustrating. Fortunately, there’s a reliable workaround: creating a new admin user directly in your site’s database using phpMyAdmin. This guide will walk you through each step.
Step 1: Access phpMyAdmin
Firstly, log into your web hosting control panel and open phpMyAdmin. You need to select the database associated with your WordPress site. If you’re unsure of the database name, it’s listed in the wp-config.php file in your WordPress root directory.
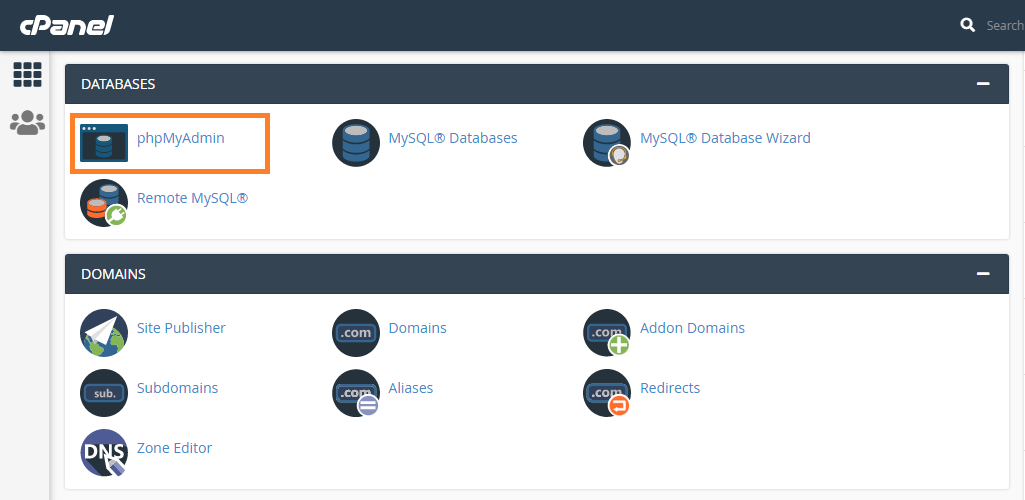
Step 2: Insert a new user in the wp_users table
Navigate to the wp_users table within phpMyAdmin.
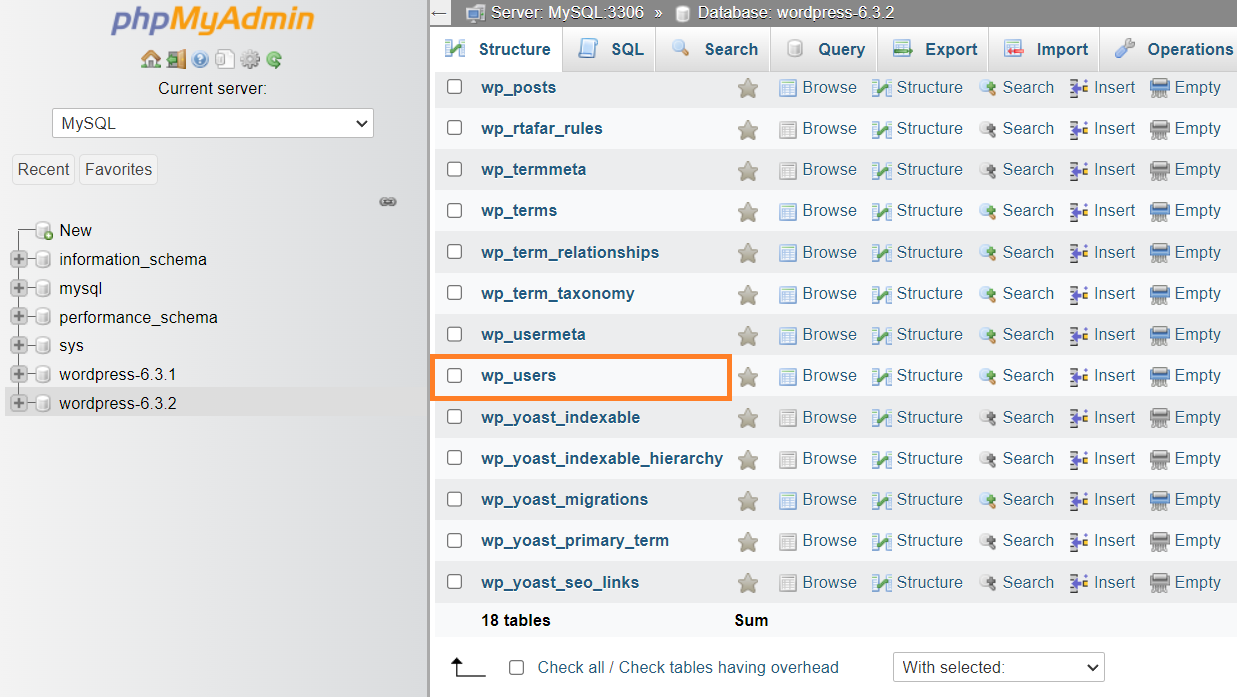
Note: Keep in mind that the prefix “wp_” in table wp_users might be different in your environment, as it can be customized during the WordPress installation.
In the wp_users table, click on the “Insert” tab.
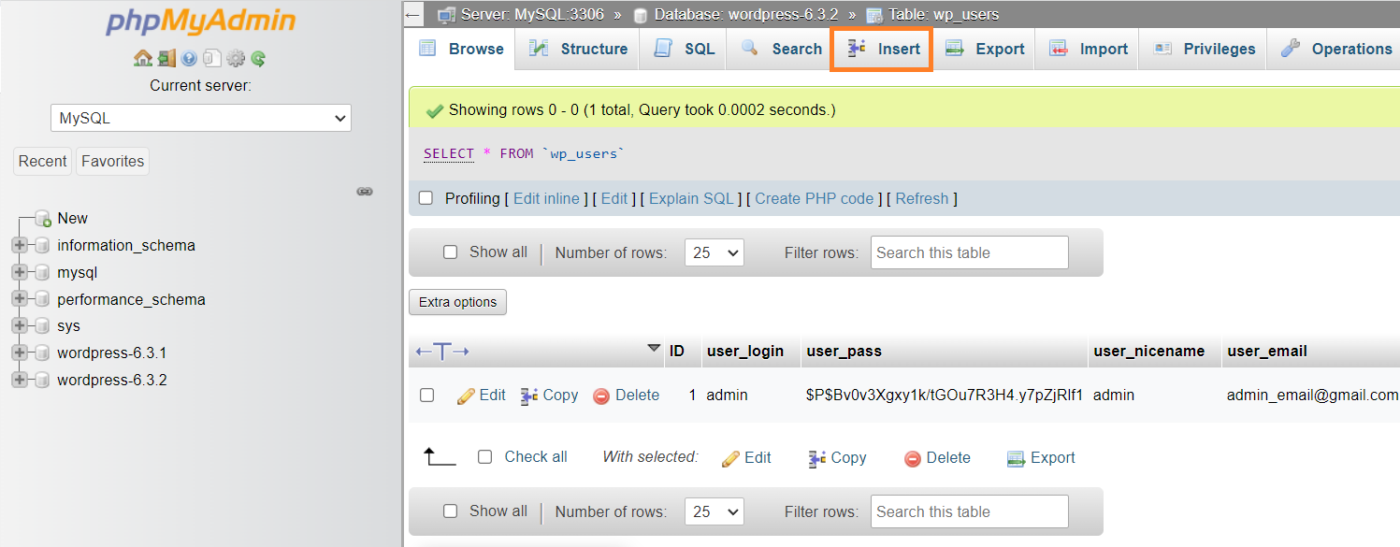
The essential fields to fill are:
user_login: Choose a new admin username.user_pass: Set a password and select MD5 in the functions menu to encrypt it.user_email: The email address for the new admin account.user_registered: Date and time of registration.user_status: Set this to 0.
Here’s what it looks like:
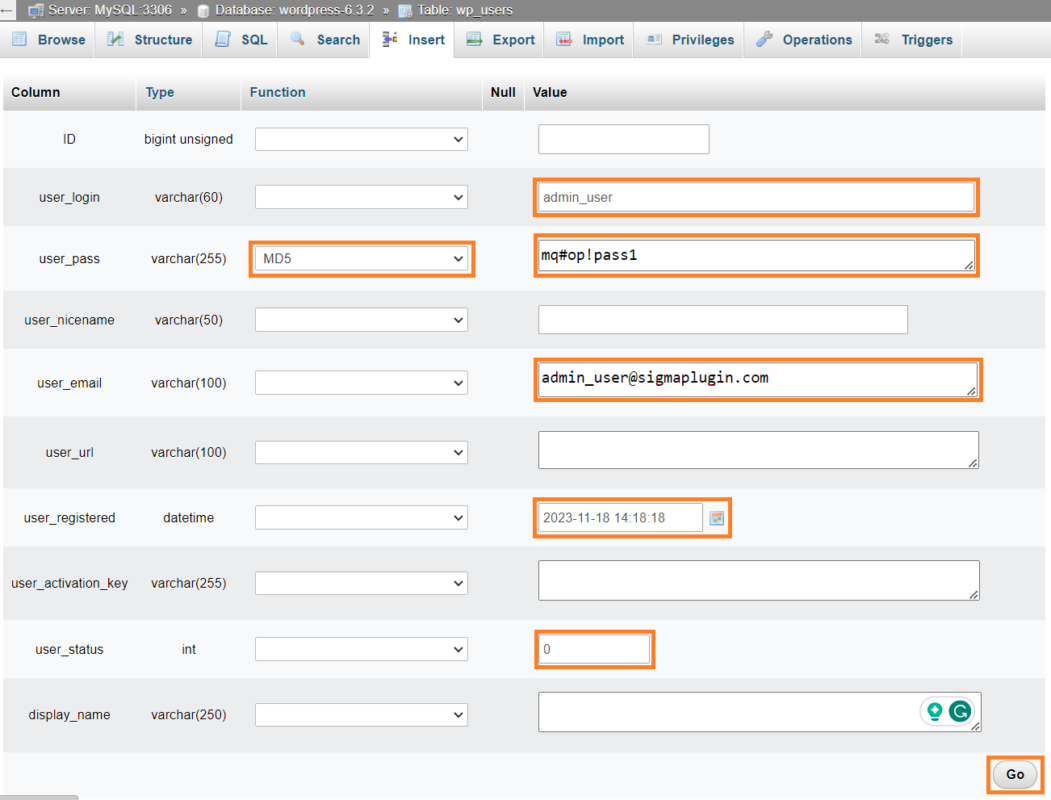
You can keep the other fields empty.
After filling in the fields, scroll down to the bottom and click on ‘Go’.
After clicking ‘Go’, a confirmation screen will show. Revisit the wp_users table to find your new user, and note the ID column value for the next step.
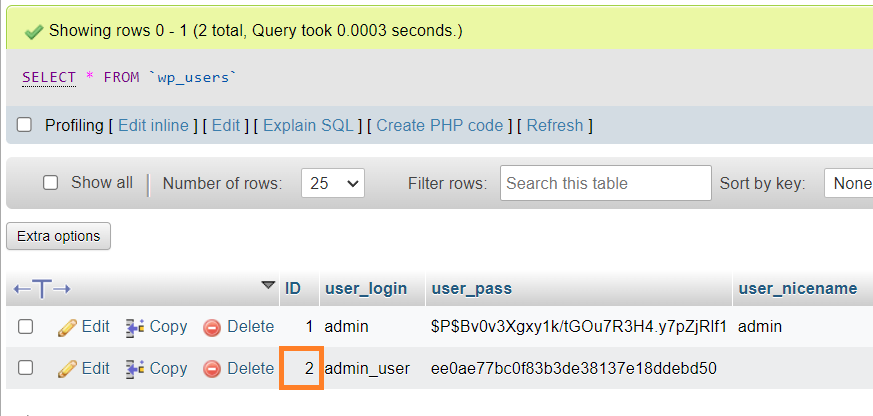
Step 3: Assign admin capabilities in wp_usermeta table
To complete the process, navigate to the wp_usermeta table and select ‘Insert’. Keep in mind that the “wp_” prefix might vary in your setup, in such cases, look for [your_prefix]_usermeta.
Then, fill in the following values:
user_id: Enter the ID of the user you created in the previous step.meta_key: Type inwp_capabilities(If your table’s prefix differs from “wp_”, replace it accordingly, like so: [your_prefix]_capabilitiesmeta_value: Set the value toa:1:{s:13:"administrator";s:1:"1";}
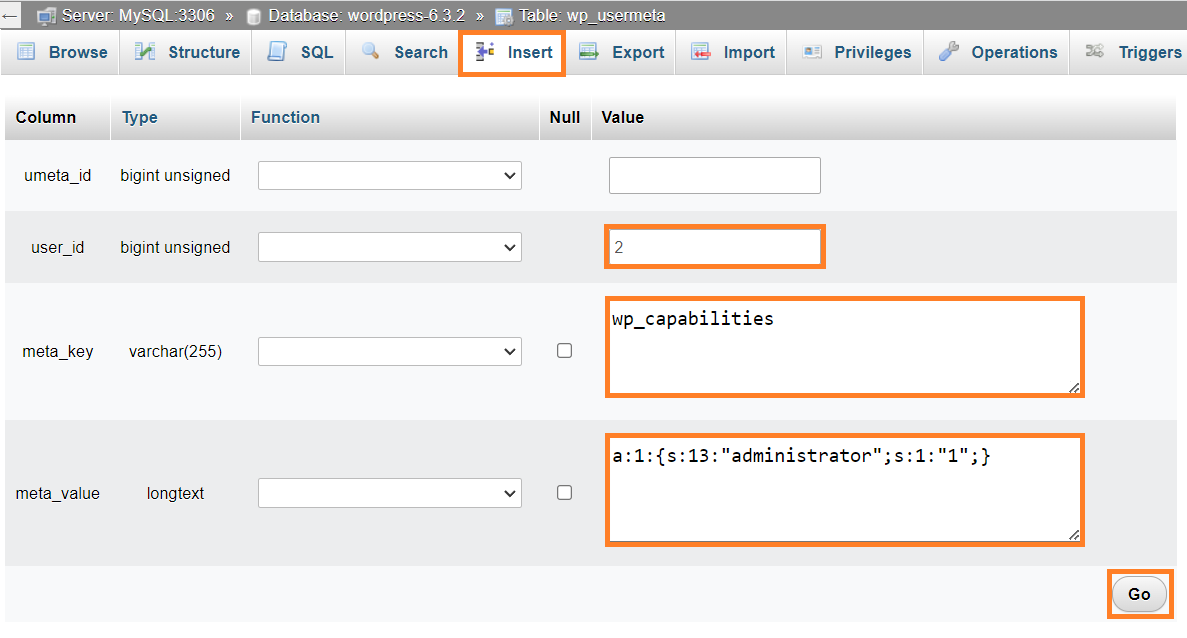
Select ‘Go’ to finalize the user meta creation. You can then log into your WordPress site with the credentials established in Step 3.
Conclusion: By following these steps, you can easily add a new admin user to your WordPress site through phpMyAdmin, bypassing the need for access to the admin panel. This method is a lifesaver for regaining control of your website in many situations. Always remember to keep your website credentials secure and regularly back up your site to prevent such issues.