

Failed WooCommerce orders occur when a payment fails or is declined.
Over time, outdated failures clutter your order list and add unnecessary database records.
Cleaning up orders you no longer need keeps your store easier to manage while preserving recent cases for follow-up.
To clean up failed WooCommerce orders with the WOptimize plugin, open Orders → Orders cleanup and find Failed orders. Set how much recent data to keep, review the matching orders, then either purge that category or select individual orders to delete.
This guide covers bulk cleanup, deleting selected orders, and automating routine cleanup. It also explains how to remove every failed order when you deliberately want no retention period.
A practical scenario: old failures, recent follow-ups
Imagine you run an online clothing store. A busy promotion and several checkout tests have left failed orders in your database. Your team has resolved the older cases, but it still needs recent records to investigate payment issues and help customers retry checkout.
You have two useful options: remove all failed orders older than your chosen cutoff, or delete only specific records whose investigations are complete. The WOptimize plugin puts the retention setting, matching-item preview, and cleanup action together so you can choose the right scope.
| Your goal | Use this approach |
|---|---|
| Remove old failures while keeping recent orders | Choose a retention period, review the preview, then use Purge on the Failed orders row. |
| Delete only a few reviewed orders | Open the item count, check the specific rows, then use Delete selected. |
| Remove every failed order, including recent ones | Set failed-order retention to 0, review the expanded list, then use that row’s Purge button. |
| Clean up old failures automatically | Create an Automation task for Failed orders, set its Keep last retention, and choose a recurring frequency. |
What to check before deleting failed orders
WooCommerce uses the Failed status when payment has failed or been declined. If an order’s payment outcome is unclear, check its order notes and payment gateway records before treating it as disposable. See WooCommerce’s order-status documentation for the distinction between Failed, Pending payment, and On hold.
- Make a restorable database backup. The WOptimize plugin’s purge confirmation warns that deletion is permanent and cannot be undone.
- Keep records you still need. Leave orders involved in customer support, payment reconciliation, or an unfinished investigation out of the cleanup.
- Choose a retention period that fits your workflow. The interface suggests 14 days for failed orders; a team that needs more time could choose 30 days or longer.
- Check the dates. Retention is based on the order’s creation date. It does not measure how long the order has been in Failed status. The preview labels its date column Date (UTC).
Step 1: Find failed orders in the WOptimize plugin
In your WordPress dashboard, open WOptimize plugin → Orders → Orders cleanup. Find the Failed orders row and wait for its scan to finish. The row shows the retention setting, the number of matching items, a refresh control, and its own Purge button.
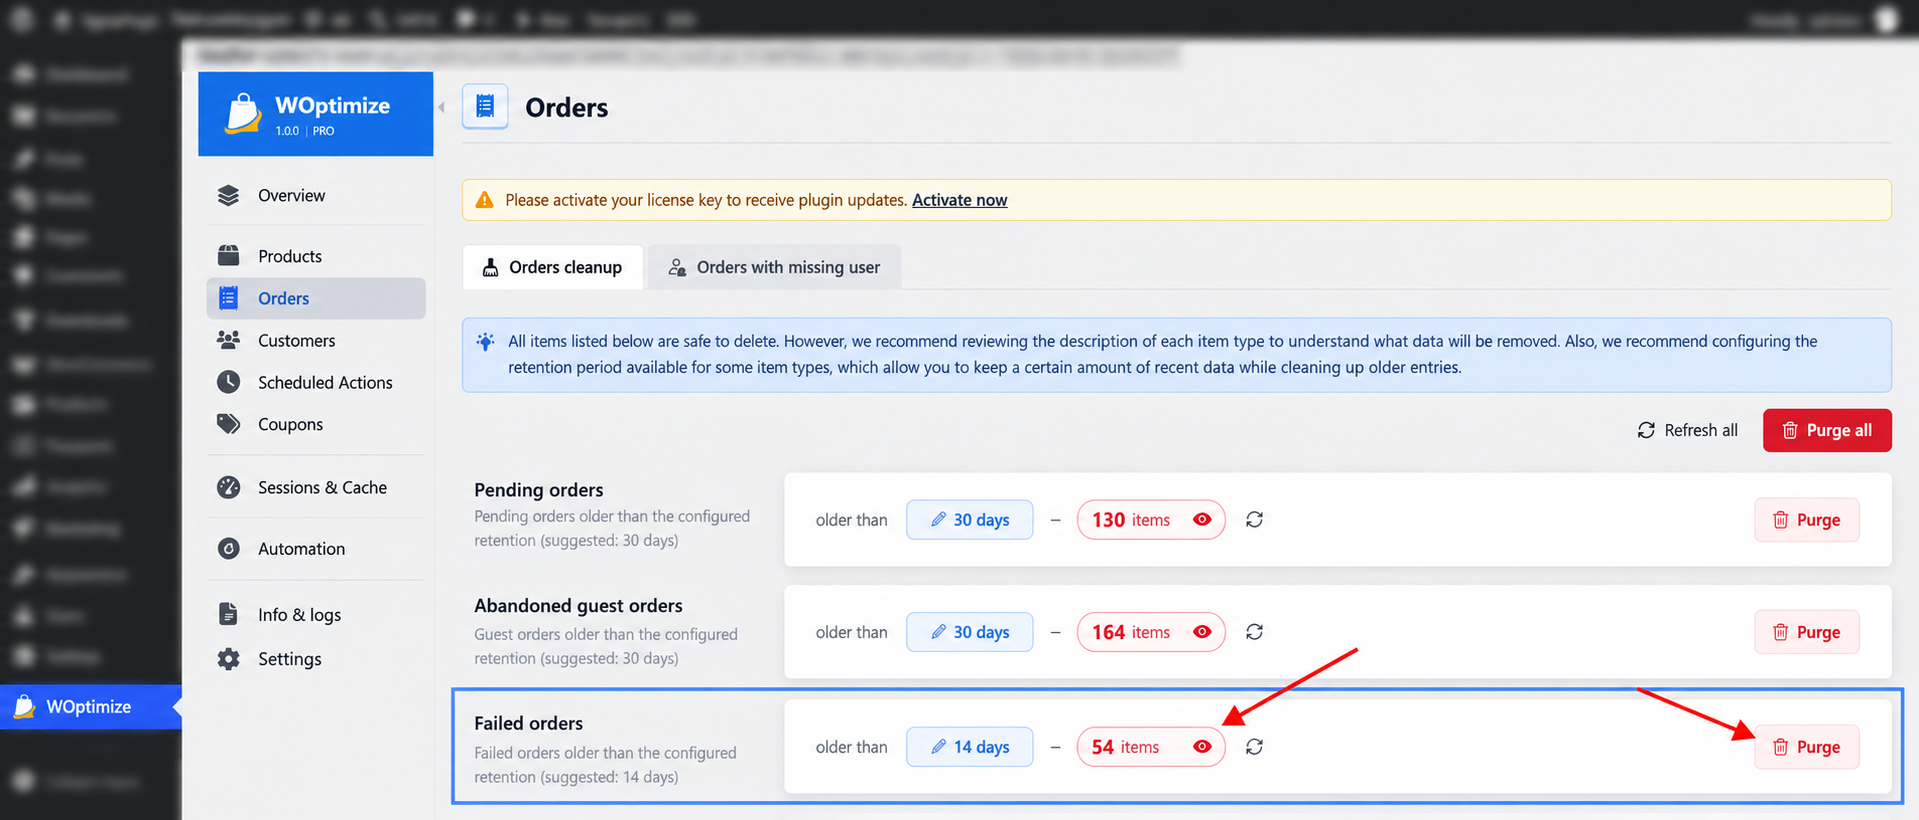
The example shows 54 items eligible for cleanup with a 14-day retention setting. Your count depends on your store’s orders and the retention period you choose.
Step 2: Decide how much recent data to keep
- Click the retention value on the Failed orders row, shown as 14 days in the screenshot.
- In Retention settings, enter the number of days to preserve. For example, choose 30 and Days if your support team needs a month of recent orders.
- Leave Apply to all items in the current tab unchecked when you want to change failed-order retention only.
- Click Save, then check the refreshed failed-order count before continuing.
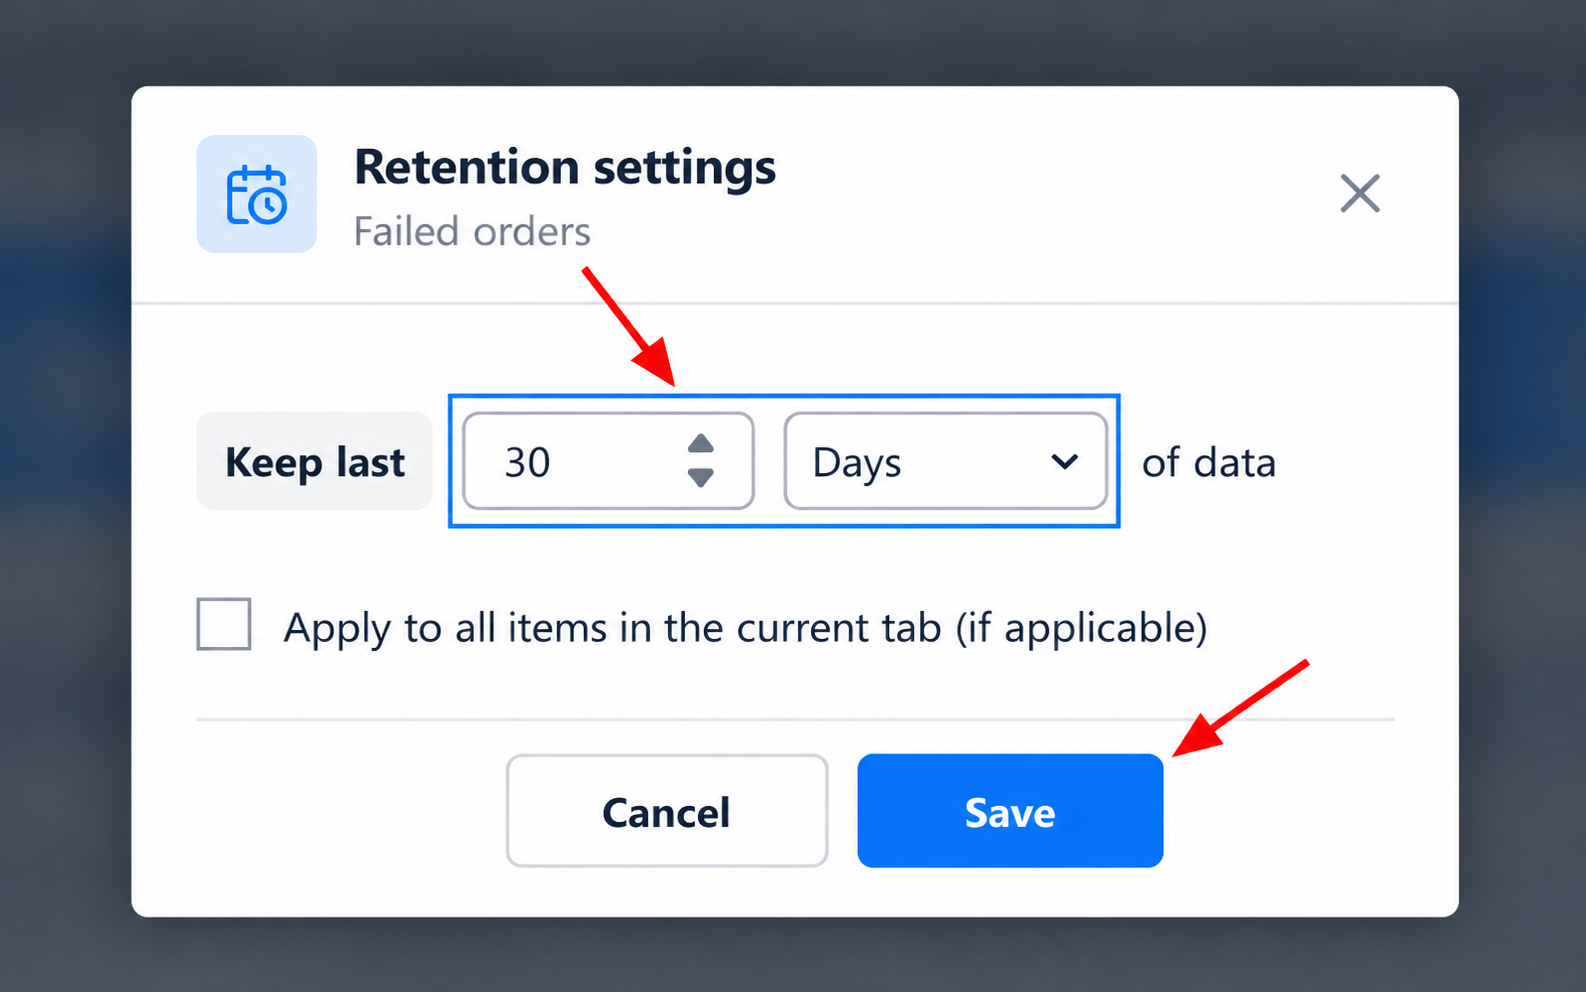
Saving retention changes which orders are eligible for cleanup; it does not delete them. A longer period keeps more recent data out of the cleanup list. Always inspect the resulting list, particularly when an older order has only recently become relevant to a support case.
Option A: Bulk-delete all eligible failed orders
Use this route when every failed order outside your retention window has been reviewed and is no longer needed.
- Click the item count on the Failed orders row to preview the matching records.
- Review the order IDs, status, and dates. Open an order ID if you need to investigate its details.
- Close the preview and click Purge on the Failed orders row.
- Check that the confirmation is titled Purge Failed orders? and that its retention period matches your intention. With 14 days selected, it warns that items older than 14 days will be permanently deleted.
- Confirm Purge only when the scope and backup are correct. Wait for completion, then refresh the row to verify the result.
Use the row-level button carefully: the separate Purge all button at the top of Orders cleanup covers multiple cleanup types, each with its own retention setting. It is broader than failed-order cleanup.
How to remove every failed order, regardless of age
If you have reviewed every failed order and want to remove them all, open the failed-order retention dialog and set the value to 0. Saving zero removes that category’s retention restriction. Leave the apply-to-all checkbox unchecked, save, review the resulting list, and use Purge on the Failed orders row.
This includes recent failed orders that a nonzero retention period would have protected. Afterward, restore your preferred retention period for future manual cleanups.
Option B: Delete only selected failed orders
Use selective cleanup when only some records are ready to go. For the clothing-store example, your team might have finished investigating two older orders while keeping the remaining cases for follow-up.
- Click the failed-order item count to open the preview.
- If needed, enter an order ID in Search for, choose ID under Search in, and click Filter. Verify the actual IDs in the results rather than relying only on the search term.
- Check the box beside each order you want to remove. Leave other rows unchecked.
- Verify the number in Delete selected. In the screenshot, orders 21725 and 21726 are checked, and the button reads Delete selected (2).
- Click Delete selected, review the confirmation, and confirm only the intended selection.
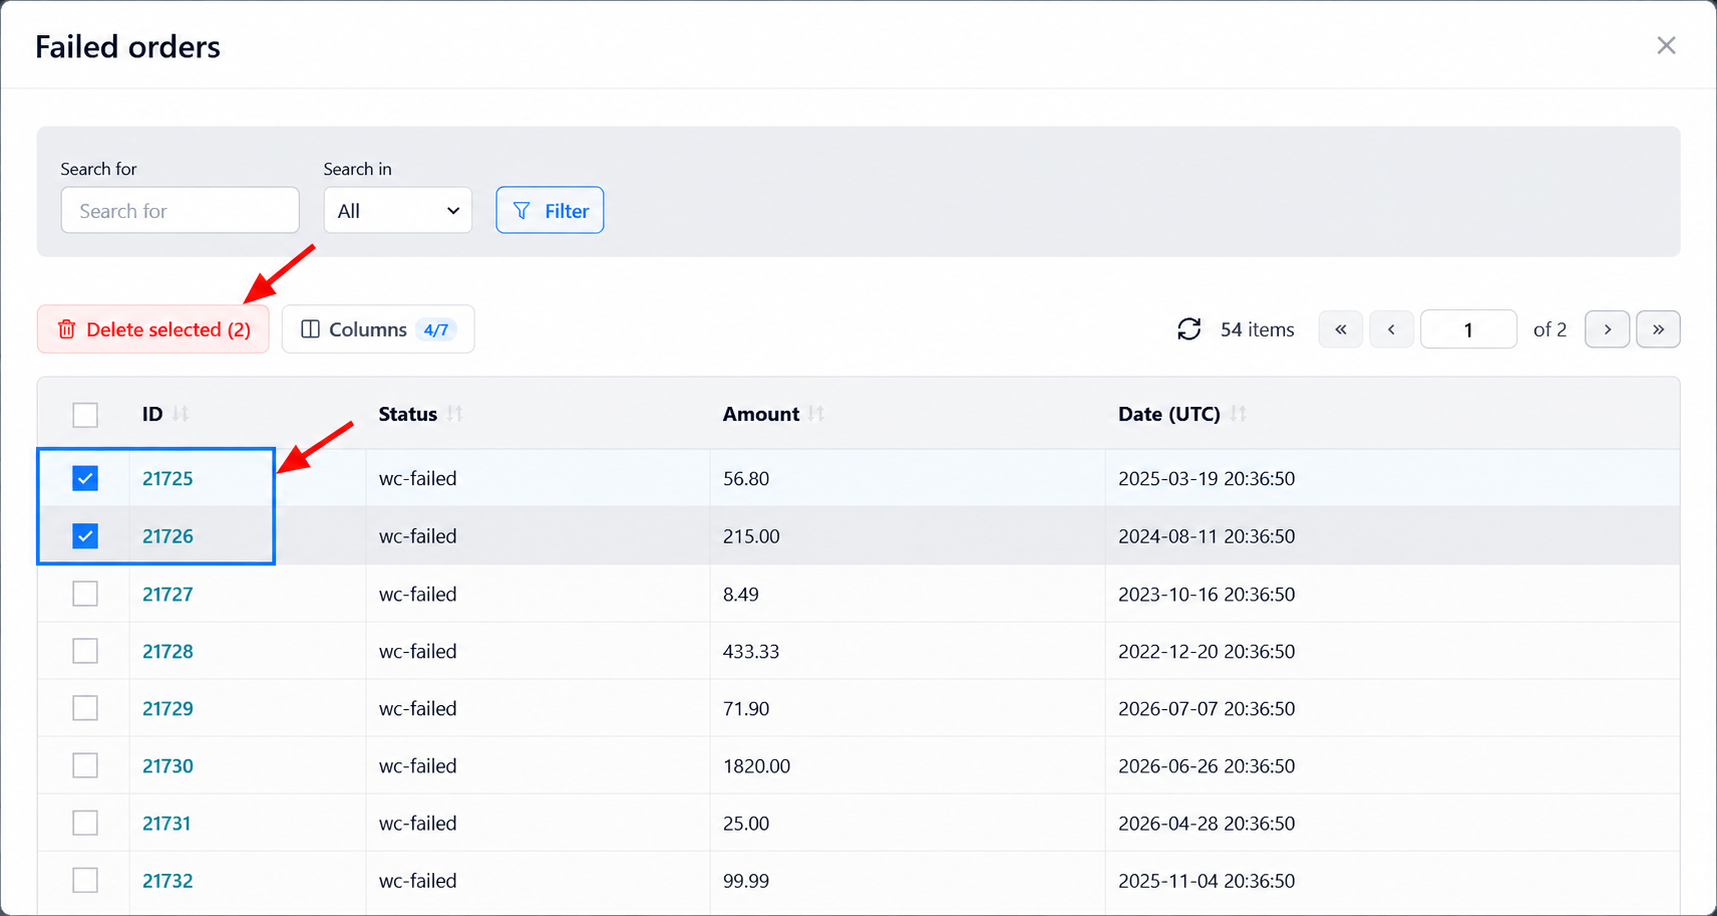
The preview is paginated. Check the selected count before confirming, especially after filtering or changing pages. If an order is missing, check your retention window and active search filter. The Columns control lets you choose which order details to display.
How to automate failed-order cleanup
You can also automate failed-order cleanup with the WOptimize plugin. For the clothing-store example, a weekly task can remove older failed orders while keeping the last 30 days available for payment checks and customer follow-up.
- Open the WOptimize plugin, go to Automation, and click New automated task.
- Click Select items… and select only Failed orders under Orders. Leave other cleanup items unchecked.
- Set the task’s own Keep last value to 30 and choose Days. Review this setting even if you already chose a retention period on the manual cleanup screen.
- Enter a clear Task name, such as Weekly failed-order cleanup. Set Frequency to Once weekly, or choose another recurring interval that suits your store.
- Choose a future Start time, using the Local time shown in the form. Leave Active enabled when you want the task to run on schedule.
- Check that Summary lists only Failed orders. Confirm your retention period and database backup, then click Create task.
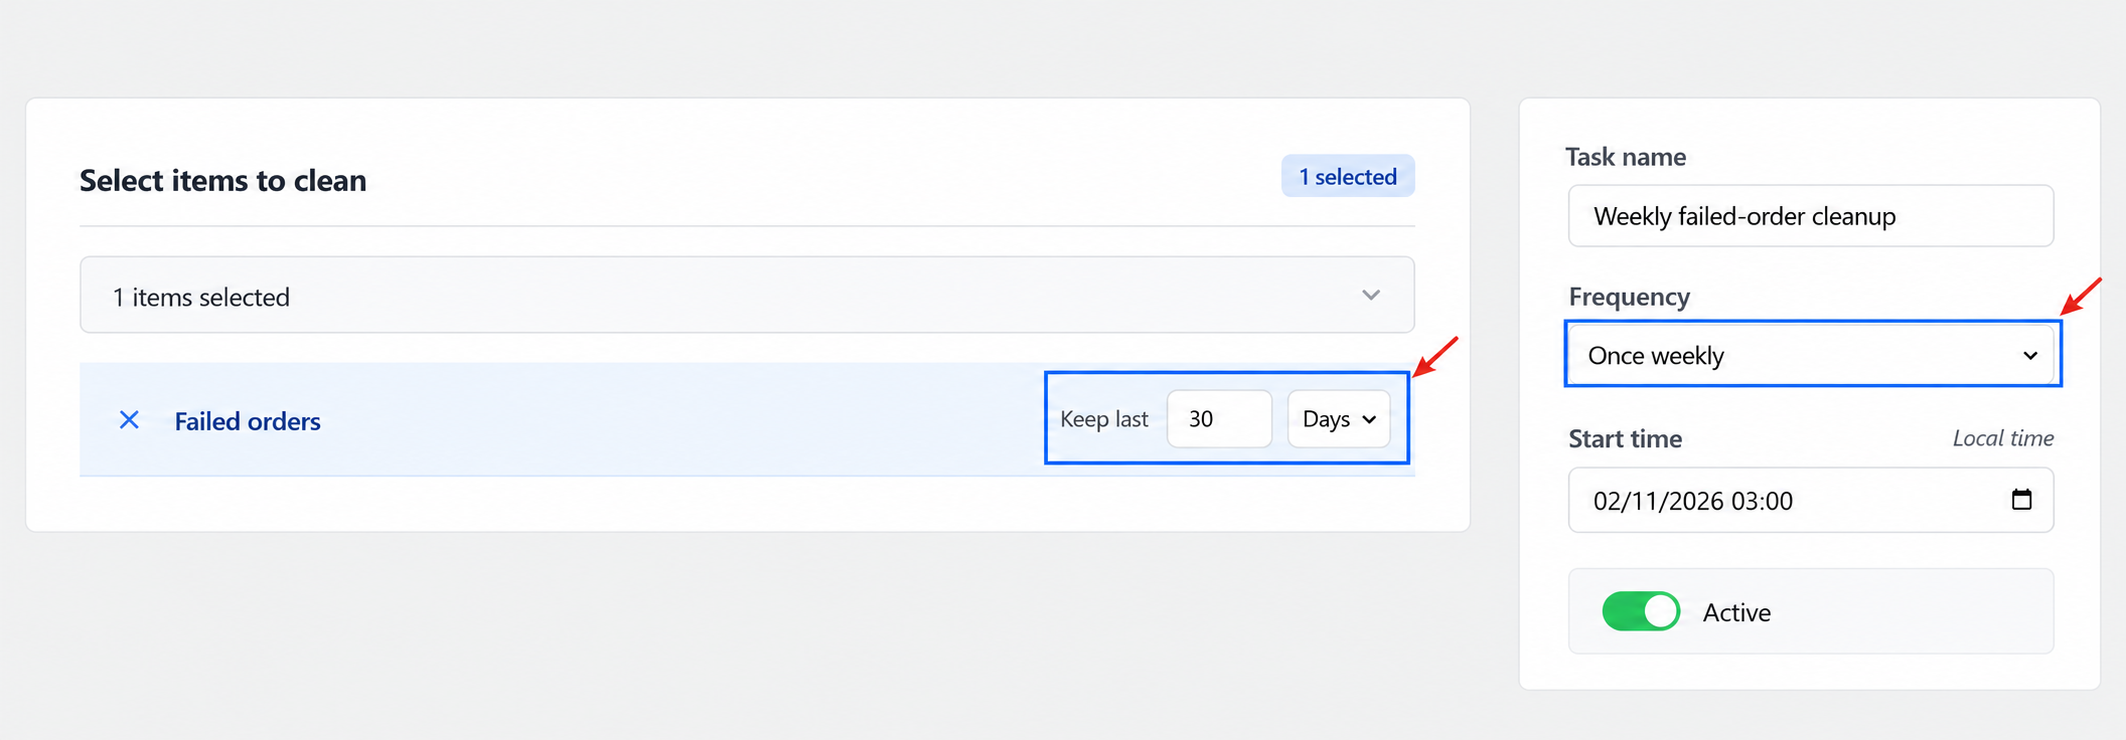
Frequency and retention do different jobs: Once weekly controls how often cleanup runs; Keep last 30 Days controls which orders it preserves. Each run removes eligible failed orders outside that window. Use selective manual cleanup instead if individual orders still need case-by-case review.
After creating the task, check its Next run on the Automation screen. After the first run, review Last run and Events log. Use Edit to adjust the task, or switch it off to pause future cleanups.
After cleanup: verify the result and address recurring failures
Refresh the failed-order count and reopen the preview. A complete purge should leave no matching items at that moment; a selective cleanup should leave the records you intended to keep. Retained recent orders may still exist in WooCommerce even when the WOptimize plugin has no eligible older records to show.
Cleanup removes records you no longer need. It does not repair a payment gateway or prevent new checkout failures. If failed orders keep accumulating, investigate the order notes and gateway logs before repeating the cleanup. The practical benefit is a more manageable order history and fewer unwanted records; any performance improvement depends on your store and should be measured.
FAQ
Are recent orders kept?
Yes, when they fall within your retention window. Setting retention to 0 makes all failed orders eligible for cleanup.
Can I undo deletion?
No. Cleanup permanently deletes orders. Back up your database first so you can restore records if needed.
Are completed orders affected?
No.
